Gluten Free Pumpkin Bread
Finding the perfect gluten free pumpkin bread recipe can feel like searching for a needle in a haystack. Most recipes promise bakery-quality results but deliver dense, crumbly loaves that fall apart at the first slice. The texture might be gummy inside while the edges turn hard as rocks.
But here’s the truth. Making incredible gluten-free pumpkin bread isn’t about luck or magic ingredients. It’s about understanding a few key techniques that most recipes never mention.
This guide walks you through every step of creating a gluten-free pumpkin bread that rivals anything from your favorite bakery. You’ll discover the one mixing trick that changes everything about texture. You’ll learn which common mistakes turn your bread dense and how to avoid them completely.
Keep reading because the secrets to perfect gluten-free baking appear throughout this entire guide. Miss one section and you might miss the trick that makes all the difference.
Why Gluten Free Pumpkin Bread Can Be Challenging

Gluten works like a stretchy net in traditional baking. It traps air bubbles and creates that soft, tender crumb everyone loves. When you remove gluten from pumpkin bread, you lose this structural support system.
Without gluten, your bread batter behaves differently. The ingredients don’t bind together the same way. Air bubbles escape more easily. The final texture often turns out dense or gummy instead of light and fluffy.
Most home bakers make three critical mistakes with gluten-free pumpkin bread. They overmix the batter, thinking more mixing creates better texture. They use the wrong flour blend without understanding protein content. They skip one ingredient that acts as a gluten substitute.
Temperature control matters more in gluten-free baking than you might expect. Room temperature ingredients blend smoothly while cold ingredients create lumps and uneven texture. This simple detail changes your entire outcome.
The good news? Once you understand these challenges, you can work around them easily. Later in this guide, I’ll show you the exact techniques that guarantee perfect texture every single time.
The Secret to Moist Gluten Free Pumpkin Bread
The biggest secret to moist gluten-free pumpkin bread isn’t pumpkin puree or extra oil. It’s xanthan gum combined with proper fat ratios. This combination mimics gluten’s binding properties while keeping your bread tender.
Xanthan gum creates elasticity in your batter. Just one teaspoon per cup of flour blend makes a massive difference in structure. Without it, your pumpkin bread crumbles when you slice it.
Fat content plays an equally important role. Gluten-free flour absorbs moisture differently than wheat flour. You need slightly more fat to compensate for this difference and prevent dry, crumbly texture.
The moisture in pumpkin puree helps tremendously, but only when balanced correctly with dry ingredients. Too much puree creates gummy bread. Too little leaves you with a dry loaf that tastes like cardboard.
Temperature matters here too. Baking at the right temperature allows moisture to distribute evenly throughout your bread. Rush the process with high heat and the outside dries out while the inside stays gummy.
There’s one more trick involving how you prepare your pan that prevents moisture loss during baking. I’ll share that specific technique in the baking section below.
Ingredients You'll Need

Using quality ingredients makes the difference between good and exceptional gluten-free pumpkin bread. Each component serves a specific purpose in creating perfect texture and flavor.
Dry Ingredients
- 2 cups gluten-free flour blend (with xanthan gum included or add separately)
- 1 teaspoon baking soda
- 1 teaspoon baking powder
- 1 teaspoon ground cinnamon
- ½ teaspoon ground nutmeg
- ½ teaspoon salt
- ¼ teaspoon ground ginger
Wet Ingredients
- 1½ cups pumpkin puree (not pumpkin pie filling)
- 1 cup granulated sugar
- ½ cup brown sugar
- ½ cup melted butter (or coconut oil for dairy-free)
- 3 large eggs at room temperature
- 1 teaspoon vanilla extract
Optional Add-Ins
- ½ cup chocolate chips for pumpkin chocolate chip variation
- ½ cup chopped pecans or walnuts
- ½ cup dried cranberries
Your gluten-free flour blend matters enormously. Choose a blend specifically designed for baking that includes rice flour, tapioca starch, and potato starch. These create the best texture for quick breads.
Make sure your pumpkin puree comes from a can labeled “pure pumpkin” rather than “pumpkin pie filling.” The pie filling contains added sugars and spices that throw off the recipe balance.
Room temperature eggs blend more smoothly into your batter. Cold eggs create lumps and prevent proper emulsification with the fats. Set them out thirty minutes before you start baking.
Essential Baking Tools
Having the right equipment makes gluten-free baking significantly easier. Here are the tools that will help you achieve bakery-quality results every time you make this pumpkin bread.
USA Gold Standard Loaf Pan
This commercial-grade non-stick loaf pan ensures your gluten-free pumpkin bread releases perfectly every time without sticking or tearing.
- Heavy-gauge aluminized steel distributes heat evenly
- Non-stick coating prevents bread from sticking
- Standard 9×5 inch size perfect for this recipe
GIR Premium Silicone Spatula
The flexible edge of this spatula scrapes every bit of batter from your bowl and folds ingredients gently without overmixing.
- One-piece design prevents bacteria buildup
- Heat resistant up to 550°F for versatile use
- Flexible edge reaches bowl corners completely
Libby’s 100% Pure Pumpkin
This trusted brand delivers consistent pumpkin puree that creates moist gluten-free pumpkin bread with perfect texture every time.
- Pure pumpkin with no added sugars or spices
- Consistent moisture content for reliable results
- BPA-free cans for food safety

Step-by-Step Instructions

Preparation Steps
Preheat oven to 350°F before you start mixing ingredients. This ensures your oven reaches the correct temperature by the time your batter is ready. An oven thermometer helps verify accuracy.
Prepare your loaf pan by greasing it thoroughly with butter or oil, then dust it lightly with gluten-free flour. This double protection prevents sticking better than just greasing alone.
Bring all refrigerated ingredients to room temperature. This step takes at least thirty minutes but makes a huge difference in how smoothly your ingredients combine.
Mixing the Batter
Whisk together all dry ingredients in a large bowl. Make sure the baking soda, baking powder, and spices distribute evenly throughout the gluten-free flour blend. Lumps of baking powder create bitter pockets in your finished bread.
In a separate bowl, combine pumpkin puree, both sugars, melted butter, eggs, and vanilla extract. Use a hand mixer on medium speed for about two minutes until the mixture looks smooth and slightly lighter in color.
Pour the wet ingredients into the dry ingredients. Here comes the critical part that most recipes don’t emphasize enough. Fold gently with your silicone spatula just until no dry flour remains visible.
You’ll see small lumps in the batter. That’s exactly what you want. Those lumps disappear during baking. Overmixing creates tough, dense gluten-free pumpkin bread because it breaks down the starch structure.
If you’re adding chocolate chips or nuts, fold them in now with just three or four gentle strokes. Distribute them throughout without additional mixing.
Baking Process
Pour batter into your prepared loaf pan and smooth the top gently with your spatula. Tap the pan on the counter twice to release any large air bubbles trapped in the batter.
Place the pan in the center of your preheated oven. The center position ensures even heat distribution around your bread. Bake for 60 to 65 minutes without opening the oven door.
Opening the door early causes temperature fluctuations that make your bread sink in the middle. Wait until at least 55 minutes before checking for doneness.
Your pumpkin bread is done when a toothpick inserted into the center comes clean or with just a few moist crumbs. The top should feel firm when touched lightly and spring back.
Let the bread cool in the pan for 15 minutes. This cooling time allows the structure to set properly. Remove it too early and the bread might fall apart.
The Mixing Trick That Improves Quick Bread Texture

Here’s the mixing trick I promised earlier. This technique alone transforms dense gluten-free baking into light, tender results that rival any traditional recipe.
Stop mixing the moment you can’t see dry flour anymore. Count your strokes if you need to. Fifteen to twenty gentle folds should be your maximum. This feels counterintuitive because traditional baking teaches us to mix until completely smooth.
Gluten-free flour blends contain starches that break down with excessive mixing. Once broken down, these starches can’t hold their structure during baking. The result is gummy, dense bread that never achieves that light crumb you’re after.
The small lumps you see in properly mixed batter will hydrate and disappear as the bread bakes. Trust the process even though it looks wrong compared to traditional batter.
Use folding motions instead of stirring circles. Cut down through the center of your batter with your spatula, scrape across the bottom of the bowl, and bring the batter up and over. Rotate the bowl slightly and repeat.
This folding technique incorporates ingredients while minimizing gluten-free flour damage. Professional bakers use this same method for delicate cakes and quick breads.
If you’re adding mix-ins like chocolate chips, fold them through in your final few strokes. Don’t create a separate mixing session just for add-ins. Every extra stroke makes your texture denser.
Common Pumpkin Bread Mistakes to Avoid
Learning from common mistakes saves you frustration and wasted ingredients. These errors happen frequently in gluten-free baking but are completely preventable.
Using the Wrong Flour Blend
Not all gluten-free flour blends work the same in pumpkin bread. Single-grain flours like rice flour alone create gritty texture. Bean flours add an unpleasant aftertaste to sweet breads.
Choose a multi-purpose gluten-free flour blend designed specifically for baking. These blends combine different flours and starches to mimic wheat flour properties. Check the ingredient list for xanthan gum or add it separately.
Skipping the Xanthan Gum
Xanthan gum isn’t optional in gluten-free pumpkin bread. This ingredient replaces gluten’s binding properties and prevents crumbly texture. Without it, your bread falls apart when sliced.
If your flour blend already contains xanthan gum, don’t add more. Too much creates gummy, sticky texture that feels unpleasant in your mouth. Check your flour blend label carefully.
Opening the Oven Door Too Early
Gluten-free baked goods are more sensitive to temperature changes than traditional recipes. Opening your oven door during the first 50 minutes causes the bread to sink in the middle.
The structure hasn’t set yet during early baking. A sudden temperature drop collapses the delicate crumb before it can firm up. Wait until nearly the end of baking time before checking.
Removing from Pan Too Soon
That 15-minute cooling period in the pan isn’t a suggestion. Gluten-free pumpkin bread needs this time for the structure to set completely. Remove it earlier and the bread might tear or collapse.
After 15 minutes, run a knife around the edges and turn the pan upside down on a cooling rack. The bread should release easily if you greased your pan properly.
Storing While Still Warm
Wrapping warm bread traps moisture inside and creates soggy texture. Let your gluten-free pumpkin bread cool completely on a wire rack before storing. This takes at least two hours.
Condensation from warm bread makes the crust soft and can lead to mold growth. Patience during cooling pays off with better texture and longer shelf life.
Pro Tips for Bakery-Style Pumpkin Bread

These professional techniques elevate your gluten-free pumpkin bread from good to exceptional. Small details create big differences in appearance and texture.
Create That Bakery Crack on Top
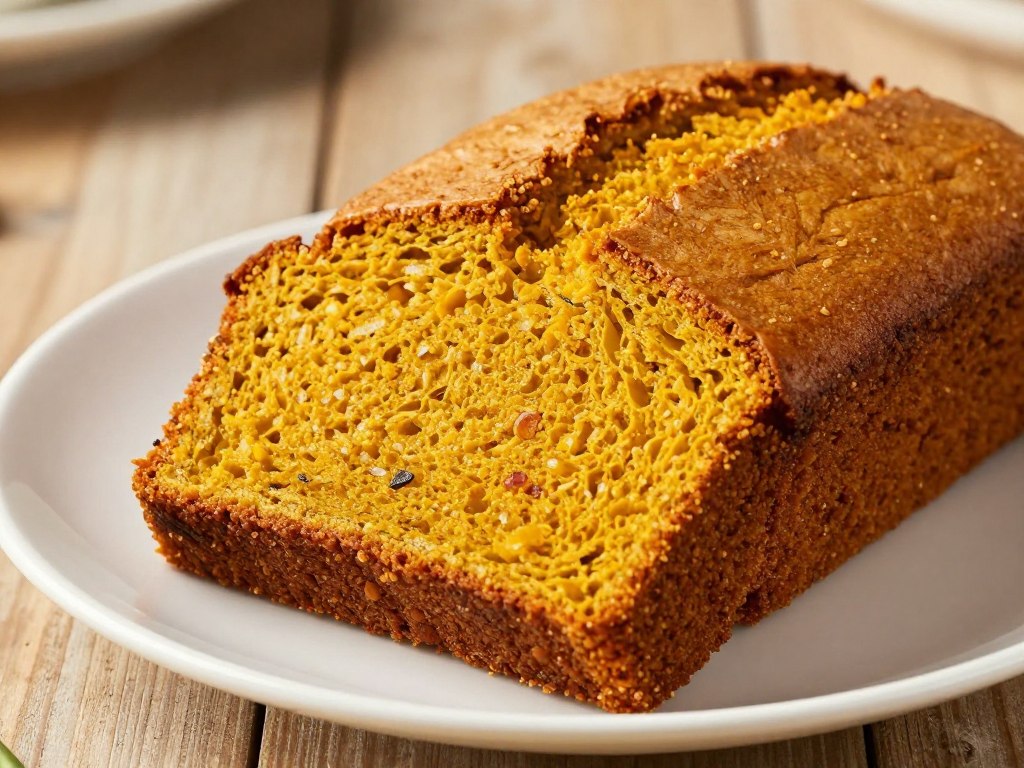
That beautiful crack down the center of bakery pumpkin bread happens naturally with proper technique. Don’t cut the top with a knife before baking. Let the bread create its own crack.
Make sure your batter fills the pan no more than two-thirds full. This allows room for the bread to rise and crack naturally as it bakes. Overfilling prevents proper rising and cracking.
Bake at 350°F consistently. Higher temperatures create a hard crust too quickly, preventing that signature crack from forming. Lower temperatures don’t set the structure fast enough.
Achieve Even Baking
Use an oven thermometer to verify your actual oven temperature. Most ovens run 25 degrees hotter or cooler than the setting shows. This variation significantly affects baking results.
Position your loaf pan in the center of the oven, not touching the sides. Air needs to circulate around the pan for even heat distribution. Push it slightly toward the back if your oven runs hotter in front.
Rotate the pan 180 degrees at the 45-minute mark if your oven has hot spots. This ensures even browning on all sides of your pumpkin bread.
Test for Perfect Doneness
A toothpick test works well, but understanding what you’re looking for matters more. The toothpick should come out with a few moist crumbs clinging to it, not completely clean and not wet with batter.
Press the top of the bread lightly with your finger. It should spring back immediately without leaving an indentation. If your finger leaves a dent, the bread needs more baking time.
The internal temperature should reach 200°F to 205°F when fully baked. An instant-read thermometer inserted into the center gives you the most accurate doneness reading.

Finishing Tools for Perfect Results
The final steps of cooling and slicing your gluten-free pumpkin bread require the right tools. These products help you achieve professional presentation.
Checkered Chef Cooling Rack
This sturdy wire rack allows air to circulate completely around your bread, preventing soggy bottoms and ensuring even cooling.
- Tight wire spacing prevents small items from falling through
- Oven-safe up to 575°F for multiple uses
- Large 12×17 inch size fits standard loaf pans
Wilton Angled Icing Spatula
This offset spatula smooths batter in your pan and helps release finished bread without damaging the sides or bottom.
- Angled design keeps hands away from batter
- Stainless steel blade won’t rust or bend
- Comfortable grip handle for precise control
Bambüsi Bread Slicing Guide
Cut perfectly even slices every time with this bamboo guide that prevents your delicate gluten-free bread from squishing or tearing.
- Adjustable thickness settings for custom slices
- Bamboo construction won’t dull knife blades
- Crumb catcher tray keeps counters clean
Enhance Flavor Development
Toast your spices in a dry pan for 30 seconds before adding them to dry ingredients. This heat activates aromatic oils and intensifies flavor dramatically. Let them cool before mixing.
Use real vanilla extract rather than imitation vanilla. The complex flavor compounds in real vanilla complement pumpkin pie spices perfectly. Imitation vanilla tastes flat and one-dimensional.
Let your finished pumpkin bread rest overnight before slicing. The flavors meld together and the texture improves as moisture distributes evenly throughout the loaf. This patience creates noticeably better bread.
Flavor Variations You Should Try

Once you master the basic gluten-free pumpkin bread recipe, these variations add exciting new flavors while maintaining perfect texture.
Pumpkin Chocolate Chip Bread
Fold 1 cup of chocolate chips into your batter during the last few mixing strokes. Dark chocolate chips complement pumpkin pie spices beautifully. Semi-sweet chocolate chips create a sweeter variation.
Reserve a handful of chocolate chips to press into the top of your batter before baking. These create an attractive appearance and add chocolate flavor to every slice.
Maple Pecan Pumpkin Bread
Replace ½ cup of granulated sugar with maple syrup. Reduce the pumpkin puree by 2 tablespoons to compensate for the extra liquid. Fold in ¾ cup of chopped toasted pecans.
The maple flavor pairs exceptionally well with pumpkin and nutmeg. Toast your pecans in a 350°F oven for 8 minutes before chopping to enhance their buttery flavor.
Cranberry Orange Pumpkin Bread
Add 2 tablespoons of orange zest to your wet ingredients. Fold ¾ cup of dried cranberries into the finished batter. The tartness of cranberries balances the sweetness of pumpkin bread perfectly.
This variation makes excellent holiday gifts. The bright orange and red colors look festive wrapped in clear cellophane with ribbon.
Pumpkin Spice Latte Bread
Add 2 tablespoons of instant espresso powder to your dry ingredients. Increase the cinnamon to 2 teaspoons. This creates a coffee-shop inspired flavor profile.
Top with a simple glaze made from powdered sugar and strong brewed coffee for extra coffee flavor. Drizzle it over cooled bread for an elegant finish.
Chai Spiced Pumpkin Bread
Replace the standard spices with 1 tablespoon of chai spice blend. This includes cardamom, ginger, cinnamon, cloves, and black pepper. The complex spice mixture creates sophisticated flavor.
Brew a cup of chai tea and use it to make a glaze for the top. The double dose of chai flavor makes this variation memorable and unique.
How to Store Gluten Free Pumpkin Bread

Proper storage keeps your gluten-free pumpkin bread fresh and moist for days. Follow these methods for maximum shelf life.
Room Temperature Storage
Wrap completely cooled bread tightly in plastic wrap or aluminum foil. This prevents air exposure that dries out the bread. Double wrapping provides extra protection.
Store at room temperature for up to 3 days. Keep it away from direct sunlight and heat sources. A bread box or cupboard works perfectly for maintaining ideal conditions.
Gluten-free pumpkin bread actually improves during the first 24 hours at room temperature. The flavors develop and the texture becomes more uniform as moisture distributes evenly.
Refrigerator Storage
Refrigeration extends shelf life to one week but changes texture slightly. The bread becomes firmer in the refrigerator. Wrap it tightly to prevent it from absorbing refrigerator odors.
Bring refrigerated slices to room temperature before eating, or warm them gently in the microwave for 15 seconds. This restores the soft texture.
Consider refrigerator storage if your kitchen stays very warm or humid. These conditions promote mold growth faster than cool storage prevents texture changes.
Freezer Storage
Freezing works beautifully for gluten-free pumpkin bread. Wrap the entire loaf or individual slices in plastic wrap, then place in a freezer bag. Remove as much air as possible before sealing.
Freeze for up to 3 months without quality loss. Label your package with the date so you track storage time accurately.
Thaw frozen bread at room temperature for 2 hours, or microwave individual slices for 30 seconds. The texture returns almost identical to fresh-baked bread after proper thawing.
Slicing Before Storage
Pre-slicing your gluten-free pumpkin bread before storage offers convenience. You can grab individual slices for quick breakfasts or snacks without thawing the entire loaf.
Place parchment paper between slices before freezing. This prevents them from sticking together and allows you to remove just the amount you need.
Freeze slices in a single layer on a baking sheet for one hour before transferring to a storage bag. This flash-freezing method prevents slices from freezing together in a solid block.
Final Thoughts

Making exceptional gluten-free pumpkin bread comes down to understanding a few key principles. Gentle mixing protects the delicate starch structure. Room temperature ingredients blend smoothly without lumps. Proper baking temperature and timing create that perfect tender crumb.
The techniques in this guide work because they address the specific challenges of gluten-free baking. You’re not just following a recipe blindly. You understand why each step matters and how it contributes to your final result.
Start with quality ingredients and the right tools. Take your time with each step rather than rushing through the process. Pay attention to those small details like ingredient temperature and mixing technique.
Your first loaf might not turn out perfect. That’s normal when learning gluten-free baking techniques. Each attempt teaches you something about how your specific oven behaves and how the batter should look at different stages.
The wonderful thing about pumpkin bread is how forgiving it can be once you master the basics. The moisture from pumpkin puree helps cover minor mistakes. The strong spice flavors remain delicious even if texture isn’t quite perfect.
Keep this guide handy for reference as you bake. Review the common mistakes section if something goes wrong. Try the different variations once you feel confident with the basic recipe.
Most importantly, enjoy the process. Baking gluten-free pumpkin bread fills your kitchen with amazing aromas. Sharing warm slices with family creates wonderful memories. The satisfaction of mastering a challenging technique makes every loaf worthwhile.
Now you have all the knowledge you need to create bakery-quality gluten-free pumpkin bread at home. Your next step is gathering ingredients and trying these techniques yourself. Happy baking!